
How to Replace a Water Filter Cartridge: Step-by-Step (2026)
Table of Contents
A food plant lost an entire shift when its RO skid tripped at 2 a.m. The cause was a water filter cartridge that had run 40 days past its change date. The membrane downstream cost $1,800 to replace. The line sat idle for six hours while a crew drove in a spare element. One skipped swap, and the bill crossed $2,000 before lunch.
This guide shows how to replace a water filter cartridge in six simple steps. The same sequence applies to how to replace water filter cartridge elements in almost any standard housing. You can use it for a sediment filter cartridge or a carbon block water filter cartridge. It also works for an activated carbon water filter cartridge and reverse osmosis filter cartridges. Every replacement water filter cartridge follows the same routine: shut off, depressurize, remove, clean, install, flush. With a wrench and a bucket, most swaps take 15 to 30 minutes (typical). Keep reading for more!
Key Facts at a Glance
- Time — A typical swap takes 15 to 30 minutes with hand tools.
- Trigger — Change the element when differential pressure rises 10 to 15 psi above the clean reading.
- Frequency — Sediment stages run 3 to 6 months; carbon stages run 6 to 12 months (typical).
- Seal — Grease the new O-ring with food-grade silicone to prevent bypass leaks.
- Flush — Run water for 3 to 5 minutes after install to purge air and carbon fines.
- Safety — Depressurize the housing before opening it; trapped pressure can launch the cap.
These six facts cover 90% of the questions maintenance teams ask before their first swap. The steps below turn each fact into a physical action.
Preparation: Safety First
Preparation decides whether the swap takes 20 minutes or two hours. A rushed change usually ends with a wet floor and a second trip to the tool box. Gather the new cartridge, the wrench and the bucket before you touch the housing.
Start by shutting the upstream supply valve. Turn it clockwise until it seats firmly. Then open a downstream tap or faucet to bleed the pressure. Let it run until the flow stops, usually 30 to 60 seconds. A standard residential line runs at 40 to 60 psi (typical). An industrial skid can hold 100 psi or more, so check the gauge and wait for it to read zero.
For hot water systems, let the housing cool below 100°F before you open it (typical). Wear gloves and safety glasses; housing water can carry scale and trapped debris. Place a bucket under the housing before you loosen anything. A 10-inch housing holds 1 to 2 liters when full, and a 20-inch housing holds twice that.
Confirm the replacement cartridge is on hand and matches the old one. Compare outer diameter, inner diameter and length before you start. Nothing slows a swap like finding the wrong element halfway through.
Tools You Need
You do not need a full toolbox. A filter wrench, a bucket and a clean rag cover most water filter cartridge replacement jobs. The table below lists the tools that handle the stubborn cases.
| Tool | Typical size or spec | Used for |
|---|---|---|
| Filter wrench / strap wrench | Fits caps 2.5 to 4.5 in | Loosening seized housings |
| Adjustable wrench | 8 in / 200 mm | Hex-cap housings |
| Bucket | 2 gal / 8 L | Catching housing water |
| Silicone grease | Food grade | Lubricating the O-ring |
| Rags and flashlight | — | Cleaning and inspection |
| Pressure gauge | 0 to 100 psi | Verifying depressurization |
Most cartridges live in housings with a 2.5-inch or 4.5-inch cap. Check the cap shape before you buy a wrench. Hex caps take an adjustable wrench; round caps take a strap wrench. Twist-and-lock housings need no wrench at all, just a firm grip and a quarter turn.
Step 1: Shut Off and Depressurize
Close the inlet valve first, then the outlet valve if one exists. On an industrial skid, follow lockout/tagout and tag the system. Open a downstream tap and run it until flow stops. This vents the trapped pressure that would otherwise spray housing water.
Confirm the pressure gauge reads zero before you touch the cap. If the system has no gauge, crack the cap a quarter turn and listen. A hiss means pressure is still trapped; close it and wait. Never open a housing under pressure; the cap can blow off and injure you.
Standard housings use right-hand threads, but some use left-hand. Check the cap before forcing it. Forcing a left-hand cap clockwise can crack the housing neck. When in doubt, mark the cap with tape and test gently.
On a multi-stage RO system, repeat the bleed for each stage. Three-stage and four-stage housings each trap their own pressure pocket. Bleeding one tap does not drain the others.
Know which valve is which before you turn anything. A bypass valve sends water around the housing; closing the wrong one leaves the housing live. Trace the pipe from the housing to the shut-off, and mark the valve with tape if the crew changes often. Inline quick-change housings have no drain valve, so the bucket catches what the cartridge holds.
Step 2: Remove the Old Cartridge
Put the bucket directly under the housing. Unscrew the cap counterclockwise by hand first. If it will not move, use the strap wrench with steady force. A seized cap usually needs 40 to 60 N·m of torque (typical). Apply the force slowly; sudden jerks can crack the cap.
Lift the old cartridge straight out and set it in the bucket. Note the direction of the flow arrow on the housing. Read the model or part number stamped on the old end cap and write it down. This number is what you quote for the replacement order.
Inspect the old element before you throw it away. Heavy sediment at the bottom suggests the pre-filter is undersized. A collapsed or burst cartridge means the change interval was too long. Tears along the pleats point to handling damage or overpressure. These clues tell you what to change, not just what to replace.
Quick-change housings with twist caps hold the cartridge against a spring. Pull the cap, and the cartridge pops partway out for easy grip. Dispose of the old element according to local rules; carbon cartridges are landfill-safe in most regions, while spent RO membranes may count as special waste.
Step 3: Clean and Inspect the Housing
Wipe the inside of the housing with a clean rag. Remove the sediment that collects in the bottom cup. Rinse the housing with clean water if scale is visible. Do not use soap; residue can foam downstream.
Inspect the O-ring groove in the cap. A cracked, flattened or missing O-ring is the most common cause of leaks after a swap. Replace the O-ring with a new one at every change (typical). Match the new ring to the groove size; a 2.25-inch ring will not seal a 2.5-inch groove.
Check the housing threads and the cap threads for damage. Look for hairline cracks around the cap neck. A cracked housing must be replaced, not patched. Reusing a cracked housing turns a 20-minute job into a flood.
In food and beverage duty, sanitize the housing once a year (typical). A food-grade sanitizer and a clean rinse keep the wet side free of biofilm. Skip this step on standard industrial water lines unless your audit requires it.
Check the center standpipe while the housing is open. Scale or grit on the standpipe blocks the cartridge bore and steals flow. A stuck check valve on the outlet lets water backwash into the housing, so confirm it closes when you push it. Both checks take 30 seconds and prevent repeat callbacks.
Step 4: Install the New Cartridge
Unwrap the new cartridge and check both end caps. Confirm the O-ring is seated and the pleats are not crushed. Apply a thin film of food-grade silicone grease to the housing O-ring. Grease stops the ring from rolling or pinching as the cap seats.
Insert the cartridge straight down over the center tube. Push until it seats against the bottom; a loose cartridge rocks and bypasses. For carbon elements, install dry; the flush step handles loose fines.
Screw the cap on by hand until it stops. Then tighten a further quarter to half turn (typical). On hex-cap housings, torque the cap to 15 to 20 ft-lb (typical). Overtightening is the number one install error; it cracks caps and crushes O-rings.
Twist-and-lock housings are different. Align the tabs, push the cap down, and twist a quarter turn until the lock clicks. Hand force only; a wrench on a twist cap breaks the locking tabs.
Some 20-inch housings take one long cartridge; others take two 10-inch cartridges stacked end to end. Install the lower cartridge first, then the upper one over the same standpipe. Stacked systems leak when the upper cartridge is not seated square, so push it down until you feel the shoulder engage.
Step 5: Flush and Test for Leaks
Open the inlet valve slowly. A sudden surge can shift the cartridge and blow the O-ring. Open a downstream tap to vent air from the housing. Keep it open until the flow runs steady with no sputtering.
Let the system run for 3 to 5 minutes. Carbon cartridges often release black fines for the first minute or two. Flush until the water runs clear; this usually takes 1 to 2 minutes extra (typical).
Check the cap seal and every joint for drips. A small weep usually stops after a quarter turn more. A steady drip means the O-ring is pinched; drain, regrease and reseat it. Confirm the pressure gauge shows a normal operating reading.
Write the install date on the housing label. The next change starts from this date, so a visible label keeps the schedule honest.
Walk the downstream line after the flush. Check the RO membrane pressure, the softener tank level and any point-of-use taps. A cartridge swap changes system pressure slightly, so confirm the readings sit inside the equipment range. Log the swap in the maintenance sheet; the log becomes the evidence for next year's budget.
When to Replace: Schedule & Pressure Drop
Differential pressure is the honest trigger for every filter. Measure it across the housing when the element is new. Change the element when it climbs 10 to 15 psi above that clean reading (typical). Most industrial housings have a gauge or indicator for this purpose.
The calendar is the backup trigger. Intervals below are typical for clean water service; heavy dirt loads shorten them. A dust collector filter cartridge follows the same rule in air, not water.
| Cartridge stage | Typical interval | Main change trigger |
|---|---|---|
| Pleated sediment | 3 to 6 months | 10 to 15 psi pressure rise |
| String wound sediment | 3 to 6 months | 10 to 15 psi pressure rise |
| Carbon block / GAC | 6 to 12 months | Chlorine taste breakthrough |
| Reverse osmosis membrane | 2 to 3 years | 15% flow drop or TDS rise |
| Dust collector element | 6 to 12 months | 1.5 to 2.5 in WC rise |
The pressure-drop rule matters more than the calendar. A filter that runs past its limit collapses or bursts. The debris it held then dumps straight downstream. That is how a 30-dollar element becomes a 3,000-dollar repair.
Run the math once and the schedule stops being optional. A plant with 12 housings changes each element twice a year. At $45 per element, that is 24 elements and $1,080 per year. Delaying one change saves $90 and risks an $1,800 membrane plus six hours of downtime. The numbers never favor the delay.
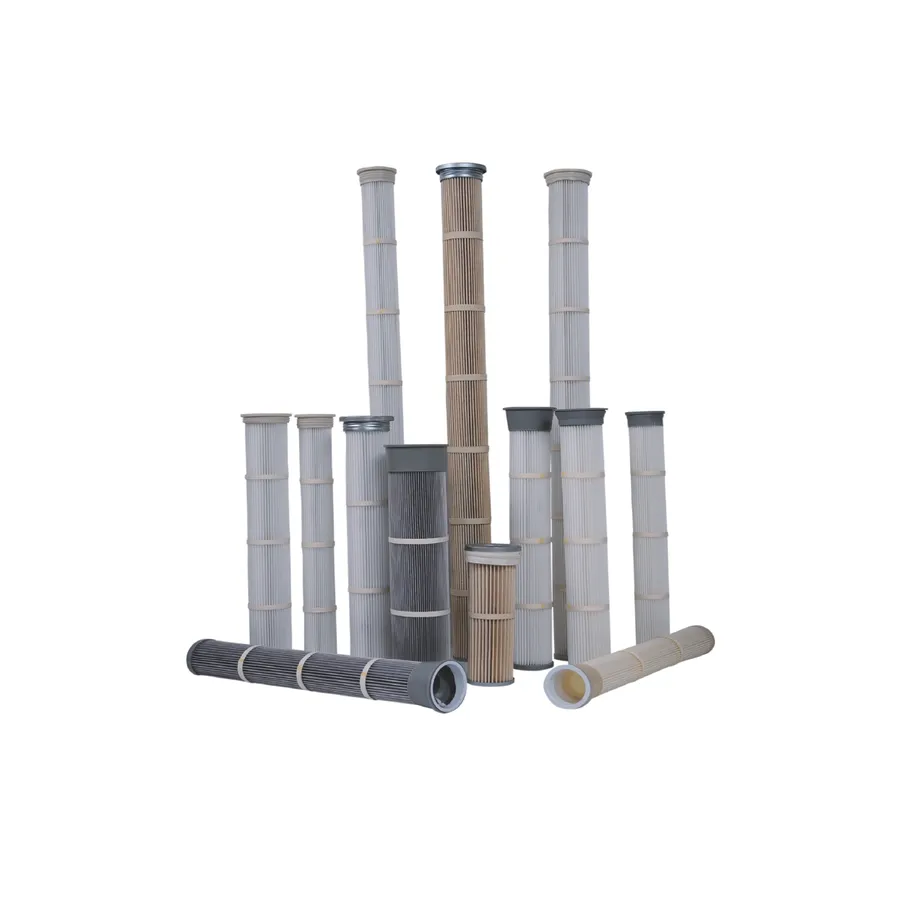
Dust collector service follows the same discipline in air. A dust filter cartridge loads with dust until the differential pressure climbs. Dust collector filter cartridge manufacturers publish clean and dirty limits for each media. Change a dust collector filter cartridge when the reading crosses the dirty limit, or on the 6 to 12 month schedule, whichever comes first. Dust collector filter cartridges in pulse-jet collectors are pulsed clean between changes, which extends the interval.
Choosing the Right Replacement Cartridge
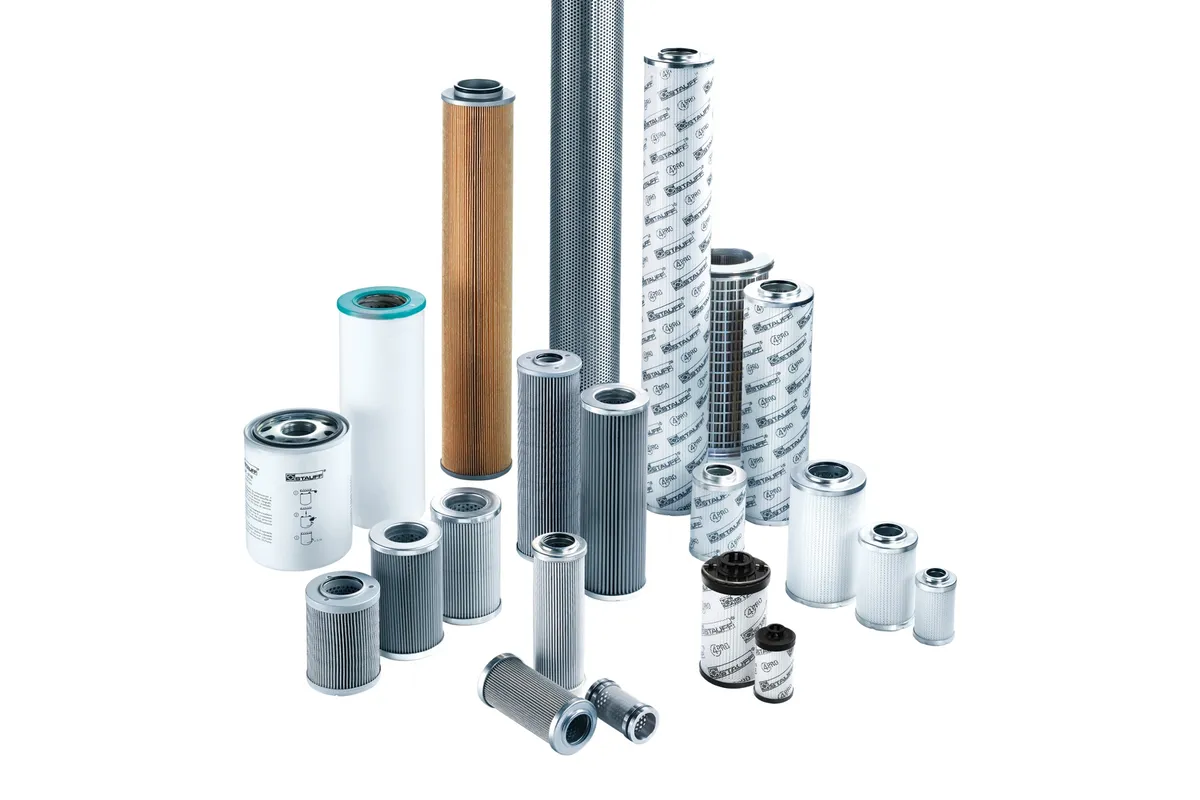
Match the replacement by dimension, not by brand habit. Outer diameter, inner diameter, overall length and seal style decide the fit. The micron rating decides the filtration result. Every replacement filter cartridge ships with a date label for a reason: track the install date, and the interval is easy to plan.
Buyers search "filter cartridge water" when they do not know the part number. The housing model matters more than the search phrase. Quote the old part number or measure the element; both routes lead to the same fit.
Micron rating decides how clean the water gets. Nominal ratings remove most particles above the stated size; absolute ratings guarantee the largest pore. A 5 micron water filter cartridge is the usual final stage, while a 20 micron or 50 micron element protects it upstream. Finer is not automatically better; a rating below the system spec raises pressure drop and shortens life.
The most common specifications in water service are these five.
- Melt blown — a melt blown filter cartridge traps sediment through the depth of the media; best for high dirt loads.
- String wound — a string wound filter cartridge wraps yarn around a core; cheap and effective for sand and rust.
- Pleated sediment — a 5 micron water filter cartridge is the standard final pre-filter before RO.
- Carbon block — a carbon block filter cartridge removes chlorine, taste and odor with tight pores.
- Granular carbon — an activated carbon filter cartridge adsorbs organics and chlorine; capacity beats particle rating.
- Stainless steel — a stainless steel filter cartridge and stainless steel filter cartridges with mesh are cleanable and reusable.
- RO guard — an RO filter cartridge sits upstream of the membrane and catches the fines that blind it.
- Household — household water filter cartridges share the same dimensions as light industrial units.
Brand housings are not a barrier. A GE water filter cartridge housing accepts a dimension-matched aftermarket element. A GE filter cartridge replacement quote needs the old part number, not just the brand name. The same applies to every branded housing: measure or read, then match.
For carbon water filter cartridge duty, decide between block and granular media. A carbon filter cartridge with block media removes particles and chlorine; granular media holds more capacity. A sediment water filter cartridge upstream protects either carbon style from coating and blinding.
For nominal depth pleated filter cartridges, the change trigger stays the same: pressure drop or elapsed time. The construction only changes how fast the element loads with dirt. Depth media holds more, pleated media filters finer; both follow the steps above.
Measure with a caliper when the old part number is worn off. Outer diameter, inner diameter and overall length are the three numbers that matter. Standard 10-inch elements are 9.75 inches long and 2.5 inches in diameter (typical). A 10-minute measurement beats a week of wrong shipments.
Stock replacement filter cartridges for the housings you service. Volume buyers usually keep replacement water filter cartridges for their three most common housings in stock. Rotate stock by date, oldest first. A filter cartridge replacement is scheduled maintenance, not an emergency. Plan it like an oil change and the system never surprises you.
If you are unsure about dimensions, send the old part number or a ruler photo. Our liquid filter cartridge range covers sediment, carbon, string wound and melt blown media in standard sizes.
Common Mistakes to Avoid
- Overtightening the cap — cracked caps are the most common field failure after a swap.
- Reusing the old O-ring — a flattened ring leaks at line pressure.
- Installing dry — an unlubricated O-ring rolls and pinches.
- Skipping the flush — carbon fines and air go straight to the point of use.
- Forcing the wrong thread — left-hand housings crack when forced clockwise.
- Buying by brand — a GE-style housing does not require a GE-brand element.
- Forgetting the date — without an install date, the schedule starts from memory.
- Mixing models — a cartridge filter cartridge mismatch happens when the element model does not match the housing model.
Every one of these mistakes shows up as a wet floor, a scored membrane or a rejected batch. Each one is avoidable with a spec sheet, a ruler and a permanent marker.
Troubleshooting After the Swap
Leak at the cap: drain, regrease the O-ring and reseat the cap. If it still weeps, the ring is the wrong size.
Low pressure after install: check the pre-filter and the housing for air. A cartridge that is too fine for the flow also drops pressure. Compare the reading with the clean-element baseline.
Milky or cloudy water: dissolved air clears within a few hours (typical). Run the nearest tap until the flow steadies.
Bad taste after a carbon swap: flush longer. Granular carbon beds can shed fines for the first 5 to 10 minutes (typical). Block media usually clears in 1 to 2 minutes.
Hissing at the cap: the housing is not fully depressurized or the O-ring is pinched. Close the inlet, vent, and start the install steps again.
If the same problem returns on every change, look upstream. A worn pre-filter or a failing pump pushes debris you cannot fix at the cartridge.
Water hammer after a swap usually means the housing filled too fast. Close the inlet partway, let the housing fill for 30 seconds, then open fully. A rattling housing points to a loose cartridge; drain, reseat and retighten. Both fixes take under two minutes.
The Bottom Line
Replacing a water filter cartridge is a six-step job that most teams finish in 15 to 30 minutes. Shut off, depressurize, remove, clean, install, flush. The two habits that prevent the expensive failures are the pressure-drop check and the install date.
Change on the schedule or the pressure reading, whichever comes first. Grease every O-ring, flush every carbon element, and torque caps to spec. A water filter cartridge replacement done right costs a few dollars and saves thousands.
When to call a professional: cracked housings, threaded connections you cannot identify, and systems that lose pressure after a correct swap. A plumber or a filtration service costs less than the flood a mistake causes. For standard industrial housings, the six steps above are all you need.
PLEATPURE manufactures sediment, carbon, string wound and melt blown liquid cartridges factory-direct. Every element is dimension-checked and pressure-tested before it ships. Browse the liquid filter cartridge range or send us your old part number for a cross-reference quote.
NEXT STEP
Ready to Switch to Replacement Filter Cartridges?
Send us your element dimensions or part numbers — our team responds within 24 hours with pricing and lead time.
Written by
Ray ChanFiltration Buyer's Guide Author · Industrial Filter Cartridge Specialist. Ray helps global importers, distributors and maintenance teams source factory-direct replacement filter cartridges.